New products
home
Arc'teryx -...Active filters
kids-harnesses
Petzl - Body - Orange - Kid's Shoulder Strapskids-harnesses
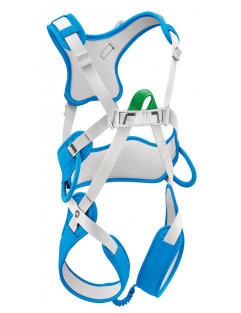
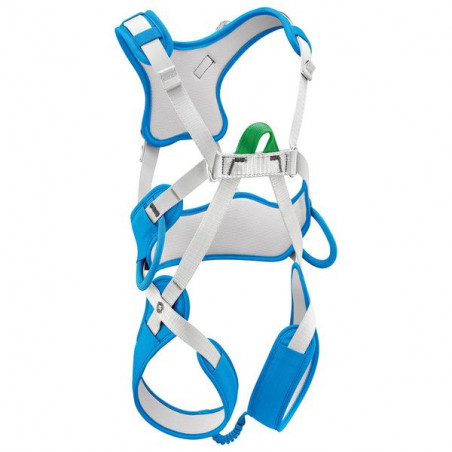
Petzl - Ouistiti - Methyl Blue - Kid's Full-Body Climbing...women-s-harnesses
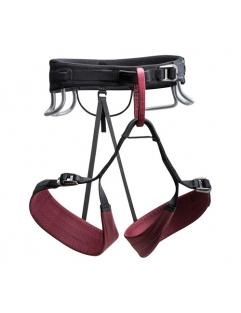
Black Diamond - W Technician Harness - Rhone - Women's...kids-harnesses
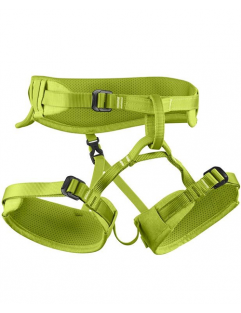
Edelrid - Finn III - Kid's Climbing Harnessmens-harnesses
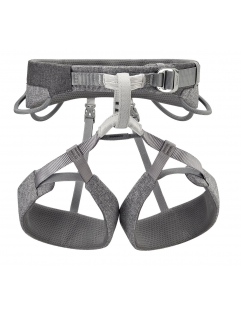
Petzl - Sama - Gray - Climbing Harnessmens-harnesses
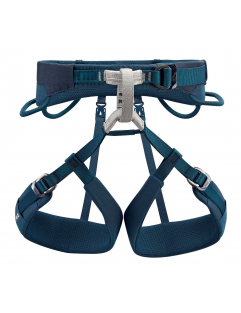
Petzl - Adjama - Blue - Climbing Harnesswomen-s-harnesses
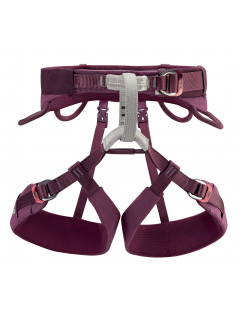
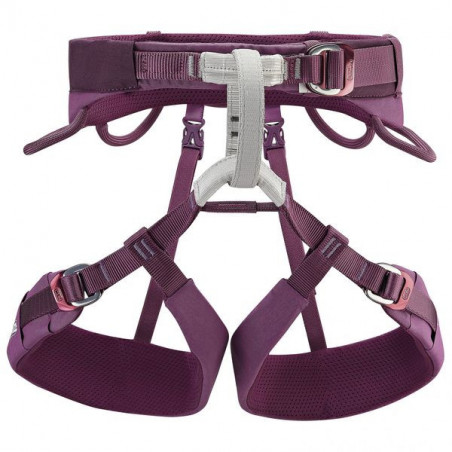
Petzl - Luna - Violet - Women's Climbing Harnesswomen-s-harnesses
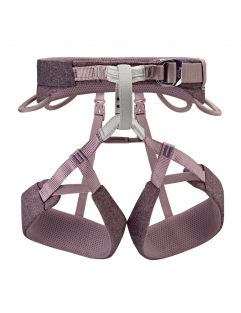
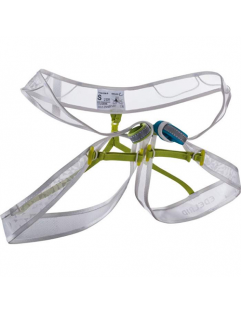
Petzl - Selena - Violet - Women's Climbing Harnessharnesses
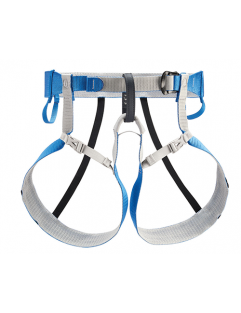
Petzl - Tour - Blue/Gray - Ski Touring Harnessharnesses
Edelrid - Loopo Lite - Ski Touring Harnessharnesses
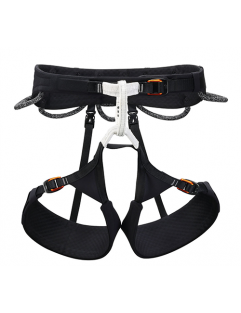
Petzl - Aquila - Black - Climbing Harnessmens-harnesses
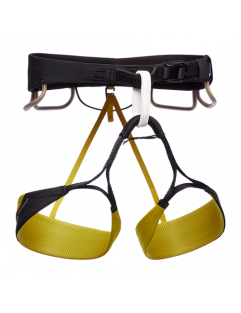
Black Diamond - M Zone Harness - Sulphur - Men's Climbing...
Harnesses
Harnesses
The climbing harness is one of the essentials when you look at buying gear for climbing. It adds the necessary safety to your climb for any type of climbing..........sports, indoor, alpine or via ferrata.
One big difference in harnesses is the weight of the product and also the comfort. Some are more adjustable than others and some can carry more gear than others. So don't just buy a harness because of the price but rather really look in to what your needs are and what you plan to do with it.
Let's have a look at the anatomy of a harness:

Here we have the classic sports climbing harness (Selena by Petzl). What are the different technical aspects to watch out for?
1. Waist belt:
Most manufacturers look to provide maximal comfort in this area with minimal weight. Mostly adjustable by 1 or 2 buckles.
2. Belay loop:
Mostly belay loops are made of super robust nylon. They are the strongest part of a climbing harness and they are the only part that is load tested. Anything hard like the locking carabiner when belaying should be tied to the belay loop whereas things like slings should be avoided as they will make the loop wear off quicker through friction.
3. Gear loop:
Gear loops are designed to carry equipment (such as quickdraws). Most harnesses have 4 gear loops, but specialized one might have additional loops to carry even more gear. Gear loops are mostly made from plastic and/or webbing. Some harnesses even feature removable plastic gear loops that allow you to personalize it even more. These loops are never intended to be clipped into as a piece of protection at an anchor.
4. Leg loop:
They are padded for comfort and sometimes feature buckles to be able to adjust them depending on clothing choice. They are made from a variety of materials.
5. Cross-Piece:
This webbing connects the two leg loops to the front of the harness. The cross piece is adjustable and you can move the small buckle until you get the right fit.
6. Tie-in loops:
They connect to the belay loop and are not strength tested, yet independent studies show that they can withstand 12-14 kN before breaking. Any cord, rope or webbing should be attached through both the lower and upper tie–in points to properly distribute the wear. Do not belay or rappel with your carabiner attached through the 2 tie–in points—this weakens the strength of the carabiner; use the belay loop instead.
7. Buckle
They consist of 2 pieces of metal and are mostly a bit off–centre to avoid conflict with rope tie–in. A harness must have a buckle for the waist belt but does not necessarily need buckles on the leg loops.
8. Haul loop:
Located on the back of the harness, this loop of stitched webbing is used to attach a second rope or haul line. Warning: It’s not intended to be load bearing or clipped into for a piece of protection.
Types of harnesses
There are different types of harnesses for the different types of climbing out there. Harnesses come from lots of brands. Some are better for sport climbing, some for alpine climbing and some for traditional climbing, so not every harness is the same.
Sport or gym harnesses: Stripped down for fast, ultralight travel, whether indoors in the gym or on outdoor sport routes.
Typical features:
- Single automatic or double–back waist belt buckle: Quick and easy to get on and off.
- 2 gear loops: since minimal gear is needed.
- Thin belay loop: makes it lighter
- Minimal leg adjustability: sometimes none at all to minimize weight, instead they use material that will stretch and give.
Traditional (trad) harnesses: A trad harness maximizes space since a lot more gear is required than in sports climbing, while being relatively light and comfortable.
Typical features:
- Adjustable leg loops with buckles
- 4 or more gear loops: for lots of gear.
- Thick and durable padding: Increases comfort when spending a long time in the harness
- Extra lumbar padding: to stabilize the lower back and waist.
- Haul loop: For carrying up a second rope
Ice and mixed harnesses: Like the trad harnesses but designed to cope with winter conditions.
Typical features:
- Adjustable leg loops using buckles: Fully adjustable to fit over winter clothing.
- 4 or more gear loops: for lots of gear like ice axe
- Extra lumbar padding: to stabilize the lower back and waist.
- Haul loop: For carrying up a second rope
Alpine/mountaineering harnesses: Lightweight, adjustable leg loops for easy on and off.
Typical features:
- Fully adjustable leg loops and waist belt
- 4 or fewer gear loops
- Thin material: Thin material allows for a smaller and more compact harness that might not necessarily be worn the entire day.
- Thin belay loop: Saves weight
- Haul loop: For carrying up a second rope.
Women's Harnesses
You have specific harnesses for women and kids which are ergonomically right designed for their needs.
Women–specific aspects include:
- Shaped waist belt.
- Increased rise.
- Reduction in the leg–to–waist ratio.
Kid's Harnesses
A kids harness generally shares many features with that of an adult, the only difference is that they are build to accommodate a child’s physique.
Young children, usually 5 years and under, have a relatively high centre of gravity (larger head–to–torso ratio) and should be equipped with a full–body harness. This type of harness is considered a type B harness and is designed for weights up to 40Kg (88 lbs.). A sit harness is recommended once the kid's centre of gravity lowers.
How to Fit and Test a Climbing Harness
Fit:
- Loosen the straps for leg loops and waist loop.
- Step into the harness. Make sure none of the leg/belay loops are twisted or crossing. The belay loop should face the front of the harness.
- Pull the waist belt just above your hip (belly button height) to ensure that you will not accidentally slip out of the harness in the event you fall upside down.
- Adjust the leg loops, if possible. Some harnesses do not have adjustable leg loops and use a piece of elastic to allow the leg loop to stretch.
- The placement of leg loops is not as important as the placement of the waist belt; it is based more on comfort.
- Tighter leg loops give the climber more comfortable when hanging freely, although range of movement can be restricted. On the other hand,, loos leg loops provide more mobility but are not as comfortable to dead–hang in. In any case the harness is safe, so everyone must make the personal call on comfort.
- Finally, make sure the buckles on each loop are doubled back. You are now ready to test your harness.
Test:
- A harness can only be tested when hanging in it. When the harness is weighted, it should feel relatively comfortable and be easy to sit upright (like a chair).
- There shouldn't be any points of pressure where the there's a feeling of the harness digging in the skin.
- The waist belt should feel comfortable and not move around too much.You can also test for shifting by trying to pull the waist belt down over the hips. You should not be able to.
Harness standards:
All harnesses must be submitted for stringent testing to satisfy the Union Internationale des Associations d’Alpinisme (UIAA 105) or the European Committee for Standardization (EN 1277). Both of these are independent testing groups that help ensure quality standards among a variety of products.
Harnesses are categorized and defined by their shape and use. All climbing harnesses that consist of a waistbelt and 2 leg loops are classified as a Type C sit harness. On a Type C sit harness, the belay loop is tested to 15kN. A full–body harness that is child–specific is considered a Type B small–body harness and is designed for weights ≤ 40 Kg (≤ 88 lbs.). A Type B small–body harness’ tie–in points must be rated to a minimum of 10kN (2,240 lbs.).
The choices are endless and difficult today so contact our Customer Service or send us a mail to help you choose the right product for your needs.
Shop online.........more time to climb.
Casper's Supports Your Summit
Subcategories
-
Mens Harnesses
<h1>Men climbing harness</h1> <p>The climbing harness is one of the essentials when you look at buying gear for climbing. It adds the necessary safety to your climb for any type of climbing..........sports, indoor, alpine or via ferrata. </p> <p>One big difference in harnesses is the weight of the product and also the comfort. Some are more adjustable than others and some can carry more gear than others. So don't just buy a harness because of the price but rather really look in to what your needs are and what you plan to do with it. </p> <p><img src="https://caspersclimbingshop.com/img/cms/C10AO-Sitta_LowRes.jpeg" alt="" width="400" height="429" /></p> <p></p> <h2><span>How to Fit and Test a Climbing Harness</span></h2> <p><span><strong>Fit:</strong></span></p> <ol> <li>Loosen the straps for leg loops and waist loop.</li> <li>Step into the harness. Make sure none of the leg/belay loops are twisted or crossing. The belay loop should face the front of the harness.</li> <li>Pull the waist belt just above your hip (belly button height) to ensure that you will not accidentally slip out of the harness in the event you fall upside down. </li> <li>Adjust the leg loops, if possible. Some harnesses do not have adjustable leg loops and use a piece of elastic to allow the leg loop to stretch.</li> <li>The placement of leg loops is not as important as the placement of the waist belt; it is based more on comfort.</li> <li>Tighter leg loops give the climber more comfortable when hanging freely, although range of movement can be restricted. On the other hand,, loos leg loops provide more mobility but are not as comfortable to dead–hang in. In any case the harness is safe, so everyone must make the personal call on comfort.</li> <li>Finally, make sure the buckles on each loop are doubled back. You are now ready to test your harness.</li> </ol> <p><span><strong>Test:</strong></span></p> <ol> <li>A harness can only be tested when hanging in it. When the harness is weighted, it should feel relatively comfortable and be easy to sit upright (like a chair).</li> <li>There shouldn't be any points of pressure where the there's a feeling of the harness digging in the skin.</li> <li>The waist belt should feel comfortable and not move around too much.You can also test for shifting by trying to pull the waist belt down over the hips. You should not be able to. </li> </ol> <p></p> <p>The choices are endless and difficult today so contact our <a href="/contact-us">Customer Service</a> or <a href="mailto:info@caspersclimbingshop.com">send us a mail</a> to help you choose the right product for your needs. </p> <p></p> <p>Shop online.........more time to climb.</p> <p></p> <p>Casper's Supports Your Summit</p> -
Women's Harnesses
<div class="text parbase section"> <div class="mb10"> <div class="text parbase section"> <div class="mb10"> <div class="text parbase section"> <div class="mb10"> <div class="text parbase section"> <div class="mb10"> <h2><span></span></h2> <div class="text parbase section"> <div class="mb10"> <h1><span><strong>Women's Harnesses</strong></span></h1> <p></p> <p>The climbing harness is one of the essentials when you look at buying gear for climbing. It adds the necessary safety to your climb for any type of climbing..........sports, indoor, alpine or via ferrata. </p> <p></p> <p>One big difference in harnesses is the weight of the product and also the comfort. Some are more adjustable than others and some can carry more gear than others. So don't just buy a harness because of the price but rather really look in to what your needs are and what you plan to do with it. <span><strong></strong></span></p> <p>We have specific harnesses for women which are ergonomically right designed for their needs. </p> </div> </div> <div class="text parbase section"> <div class="mb10"> <p>Women–specific aspects include:</p> </div> </div> <div class="text parbase section"> <div class="mb10"> <ul> <li>Shaped waist belt.</li> <li>Increased rise.</li> <li>Reduction in the leg–to–waist ratio.</li> </ul> <p><img src="https://caspersclimbingshop.com/img/cms/C035BA-LUNA-view-2_LowRes.jpeg" alt="" width="400" height="398" /></p> <p></p> </div> </div> <h2><span></span></h2> <h2><span></span></h2> <h2><span>How to Fit and Test a Climbing Harness</span></h2> <p><span><strong>Fit:</strong></span></p> <ol> <li>Loosen the straps for leg loops and waist loop.</li> <li>Step into the harness. Make sure none of the leg/belay loops are twisted or crossing. The belay loop should face the front of the harness.</li> <li>Pull the waist belt just above your hip (belly button height) to ensure that you will not accidentally slip out of the harness in the event you fall upside down. </li> <li>Adjust the leg loops, if possible. Some harnesses do not have adjustable leg loops and use a piece of elastic to allow the leg loop to stretch.</li> <li>The placement of leg loops is not as important as the placement of the waist belt; it is based more on comfort.</li> <li>Tighter leg loops give the climber more comfortable when hanging freely, although range of movement can be restricted. On the other hand,, loos leg loops provide more mobility but are not as comfortable to dead–hang in. In any case the harness is safe, so everyone must make the personal call on comfort.</li> <li>Finally, make sure the buckles on each loop are doubled back. You are now ready to test your harness.</li> </ol> <p><span><strong>Test:</strong></span></p> <ol> <li>A harness can only be tested when hanging in it. When the harness is weighted, it should feel relatively comfortable and be easy to sit upright (like a chair).</li> <li>There shouldn't be any points of pressure where the there's a feeling of the harness digging in the skin.</li> <li>The waist belt should feel comfortable and not move around too much.You can also test for shifting by trying to pull the waist belt down over the hips. You should not be able to. </li> </ol> <p><span><strong></strong></span></p> <p></p> </div> </div> </div> </div> </div> </div> </div> </div> <p></p> <p>The choices are endless and difficult today so contact our <a href="/contact-us">Customer Service</a> or <a href="mailto:info@caspersclimbingshop.com">send us a mail</a> to help you choose the right product for your needs. </p> <p></p> <p>Shop online.........more time to climb.</p> <p></p> <p>Casper's Supports Your Summit</p> -
Kids Harnesses
<h2 class="page-title"><em><span>Kid's Harnesses</span></em></h2> <p>The climbing harness is one of the essentials when you look at buying gear for climbing. It adds the necessary safety to your climb for any type of climbing..........sports, indoor, alpine or via ferrata. </p> <p>One big difference in harnesses is the weight of the product and also the comfort. Some are more adjustable than others and some can carry more gear than others. So don't just buy a harness because of the price but rather really look in to what your needs are and what you plan to do with it. </p> <div class="text parbase section"> <div class="mb10"> <p>A kids harness generally shares many features with that of an adult, the only difference is that they are build to accommodate a child’s physique.</p> </div> </div> <div class="text parbase section"> <div class="mb10"> <p>Young children, usually 5 years and under, have a relatively high centre of gravity (larger head–to–torso ratio) and should be equipped with a <span class="p2">full–body harness</span>. This type of harness is considered a type B harness and is designed for weights up to 40Kg (88 lbs.). A sit harness is recommended once the kid's centre of gravity lowers.</p> <p><img src="https://caspersclimbingshop.com/img/cms/C068AA-OUISTITI_LowRes.jpeg" alt="" width="330" height="600" /></p> <div class="text parbase section"> <div class="mb10"> <h2><span>How to Fit and Test a Climbing Harness</span></h2> <p><span><strong>Fit:</strong></span></p> <ol> <li>Loosen the straps for leg loops and waist loop.</li> <li>Step into the harness. Make sure none of the leg/belay loops are twisted or crossing. The belay loop should face the front of the harness.</li> <li>Pull the waist belt just above your hip (belly button height) to ensure that you will not accidentally slip out of the harness in the event you fall upside down. </li> <li>Adjust the leg loops, if possible. Some harnesses do not have adjustable leg loops and use a piece of elastic to allow the leg loop to stretch.</li> <li>The placement of leg loops is not as important as the placement of the waist belt; it is based more on comfort.</li> <li>Tighter leg loops give the climber more comfortable when hanging freely, although range of movement can be restricted. On the other hand,, loos leg loops provide more mobility but are not as comfortable to dead–hang in. In any case the harness is safe, so everyone must make the personal call on comfort.</li> <li>Finally, make sure the buckles on each loop are doubled back. You are now ready to test your harness.</li> </ol> <p><span><strong>Test:</strong></span></p> <ol> <li>A harness can only be tested when hanging in it. When the harness is weighted, it should feel relatively comfortable and be easy to sit upright (like a chair).</li> <li>There shouldn't be any points of pressure where the there's a feeling of the harness digging in the skin.</li> <li>The waist belt should feel comfortable and not move around too much.You can also test for shifting by trying to pull the waist belt down over the hips. You should not be able to. </li> </ol> </div> </div> </div> </div> <p></p> <p>The choices are endless and difficult today so contact our <a href="/contact-us">Customer Service</a> or <a href="mailto:info@caspersclimbingshop.com">send us a mail</a> to help you choose the right product for your needs. </p> <p></p> <p>Shop online.........more time to climb.</p> <p></p> <p>Casper's Supports Your Summit</p>


